This post was most recently updated on March 18th, 2020
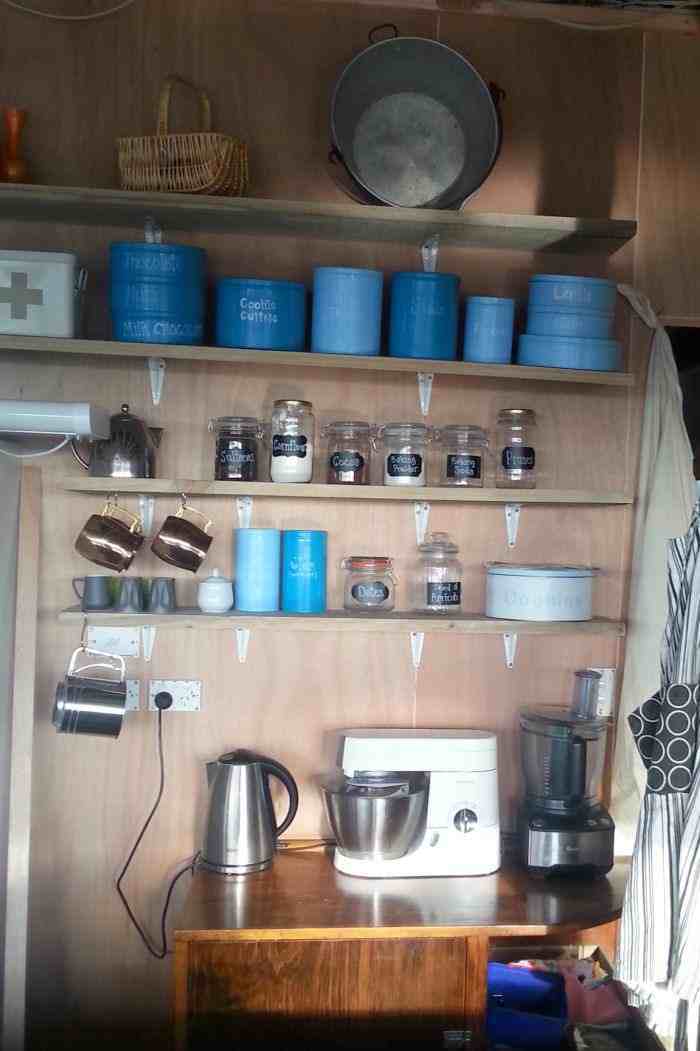
Our new kitchen is starting to come together on the Piwakawaka Valley Homestead. All it needs now are some aged timber shelves.
Please read: This information is provided for educational purposes only and is not intended to treat, diagnose or prevent any disease. We encourage you to make your own health care decisions in partnership with a qualified health care professional.
This post contains affiliate links, this means at no extra cost to you, we make a commission from sales. Please read our Disclosure Statement
I recon the heart of the home truly is the kitchen, and have I joked with my hubby that we have really built a kitchen with a table and couch area in it rather than an open plan living/kitchen/dining.
Our bench is a massive 1×4.5m (approx 3×15 feet) and really is the center of the living space. The downside (or upside!) to the way the kitchen is is that we have no ‘pantry’ as such.
We have a cupboard under the bench that I have some things in, a drawer with some cans in it and then a plan for some open shelves with painted tins and labeled mason jars for baking ingredients.
The up side is of course it makes me keep things tidy AND I get pretty storage!
I wanted to have rustic looking shelves that preferably didn’t cost much (or anything!). When we built the house the builders used boxing timber to frame up before they poured the slab so we have a large pile of very big boards that are covered in cement but otherwise just fine to re-use elsewhere, perfect for some aged timber shelves.
I thought this was a great opportunity too good to pass up.
Step by step instructions on turning rough sawn pine into rustic old-looking shelves.
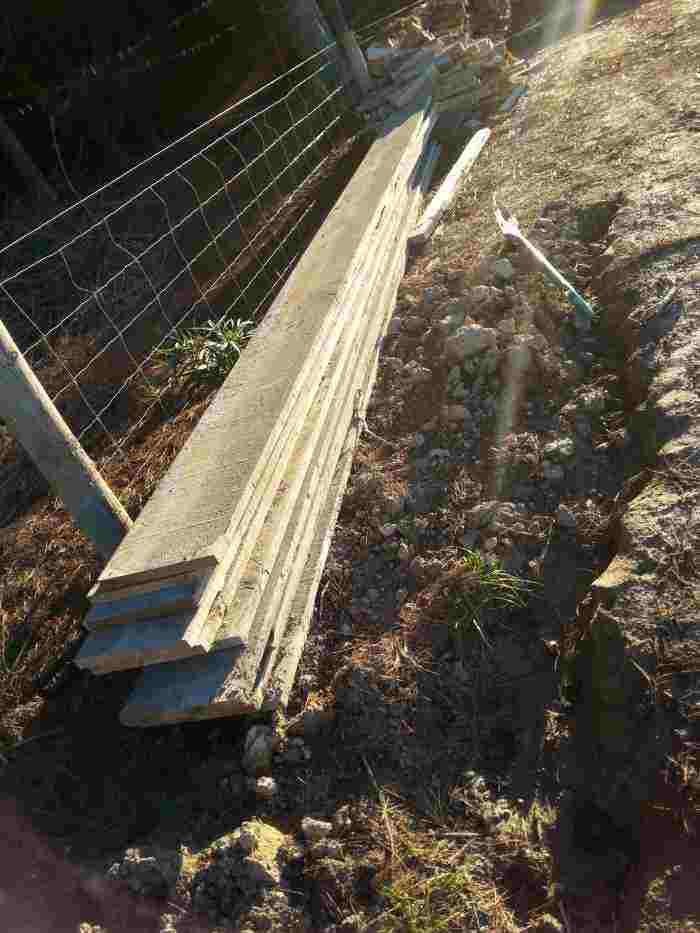
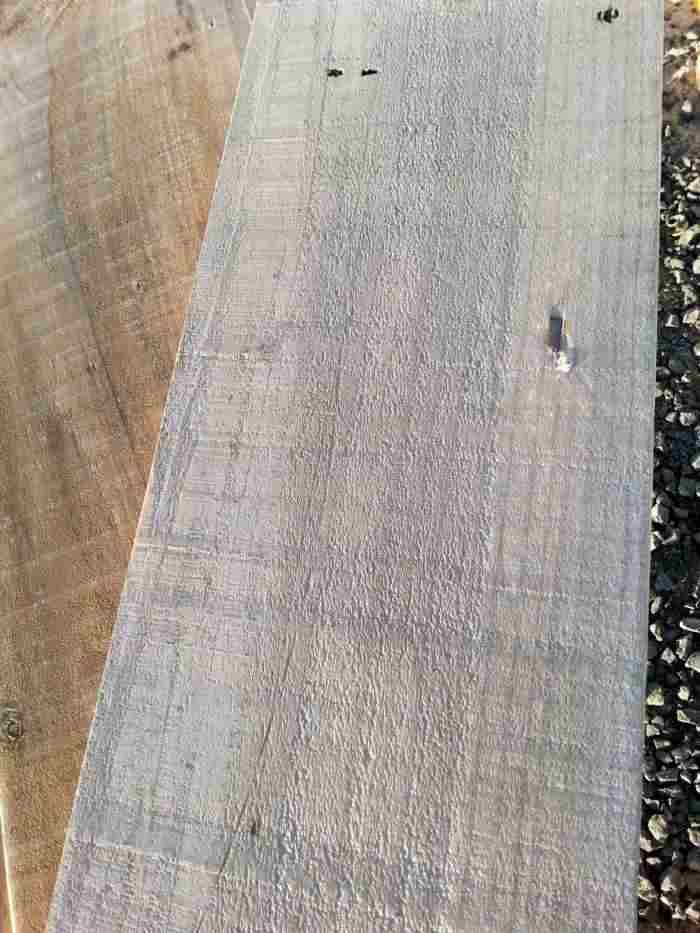
Because my pine had been used for concrete boxing the first thing I had to do was use a wire brush and scrub the old cement off.

Once they were clean(ish) I measured out how many shelves we needed. I decided on 2 x 1.2m (4 ft) and 2 x 3m (10 ft). This managed to fit on two boards as they really were very long. The boards were 35cm wide, so we used a table saw to rip them down so they are about 25cm wide.
Then I marked out the lengths of the shelves and used the skill saw to cut them to size.
Next I sanded the rough sawn timber with 80 grit sandpaper on my orbital sander. Which, by the way, is rubbish. I bought one and promptly lost the receipt of course.
When I finally got around to using it the on/off switch was dodgy right from the beginning. Eventually it stopped turning on at all, of course it was half way through sanding my benchtop.
Also the clamp-thingy-that-holds-the-pieces-of-sandpaper-on-if-you-don’t-use-the-velcro-ones fell off. So I bought a new sander. Exactly the same. I know, crazy right?
Well my reasoning was that surely the one I had was a bad batch, I could take it back with the new receipt and get my money back and still have one that works. BUT this new one seems to be from the same crappy batch.
RELATED: Shabby chic dresser DIY
Already I am too scared to turn it off in case I can’t turn it back on. AND the little clamp thingy fell off, without even being bumped or knocked!!
It just fell off. I think I will take them both back and say “Here you go, I don’t want them and I don’t want to have to dispose of them either.”
Back to the shelves. Once they had only the roughest bits sanded down I gave them a quick run over with 120 grit paper. They are by no means smooth. Just not as rough anymore.

Next my kids and I covered them in Iron Acetate and left them to dry. This oxidizes the natural tannin in the timber and makes it go grey and look old and weathered. I love it and have used it on our exposed barn posts as well. See below for the recipe to make your own!

To hang the shelves I measured from the ground and drew a level line where the shelves are to sit. Then I screwed the brackets on to the wall, placed the shelves in place and screwed them on too.
I have since discovered that my brackets are not big enough for the shelf weight and they have tilted slightly forward, so when we take them down again when we stain/varnish the ply walls I will replace them with some bigger brackets.
How pretty are these??
Make your own Iron Acetate to age timber in half an hour!
You need:
0000 steel wool. From your hardware store. No you cannot use the normal stuff from the supermarket. It doesn’t work – ask me how I know…
A jar
1-4 weeks of patience.
Directions: Half fill your jar with white vinegar – if you warm it a bit it does work slightly faster.
Add one full pad of 0000 steel wool.
Cover loosely with the lid to keep the bugs out (why do they insist on climbing in and dying in things like this??) but don’t screw it on as it needs to off-gas.
Sit the jar on a windowsill or somewhere out of the kids/dogs/resident clumsy persons reach.

Leave for one week and try it on a scrap of timber.
Leave it to dry. If it is as grey as you would like then perfect! You can use it.
If it isn’t dark enough leave it a while longer and try again. If it is too dark, simply dilute with some water until you get the desired effect.
Once you are happy, remove the steel wool and put the lid on the jar properly and you can use it whenever you feel the need.
I made a really really strong batch and then use 1/4 a cup of mixture in 1/3 a bucket of water and then use a little microfibre roller to apply.
Let me know what you think in the comments below!
Please pin and share with your friends.