This post was most recently updated on July 6th, 2021
One of our goals when built this house was to incorporate as much old (but still practical) technology as we could. I grew up with a coal range, and I really appreciated the ability to cook and be warm during those times when the power went out in the middle of a winter storm.
Please read: This information is provided for educational purposes only and is not intended to treat, diagnose or prevent any disease. We encourage you to make your own health care decisions in partnership with a qualified health care professional.
This post contains affiliate links, this means at no extra cost to you, we make a commission from sales. Please read our Disclosure Statement
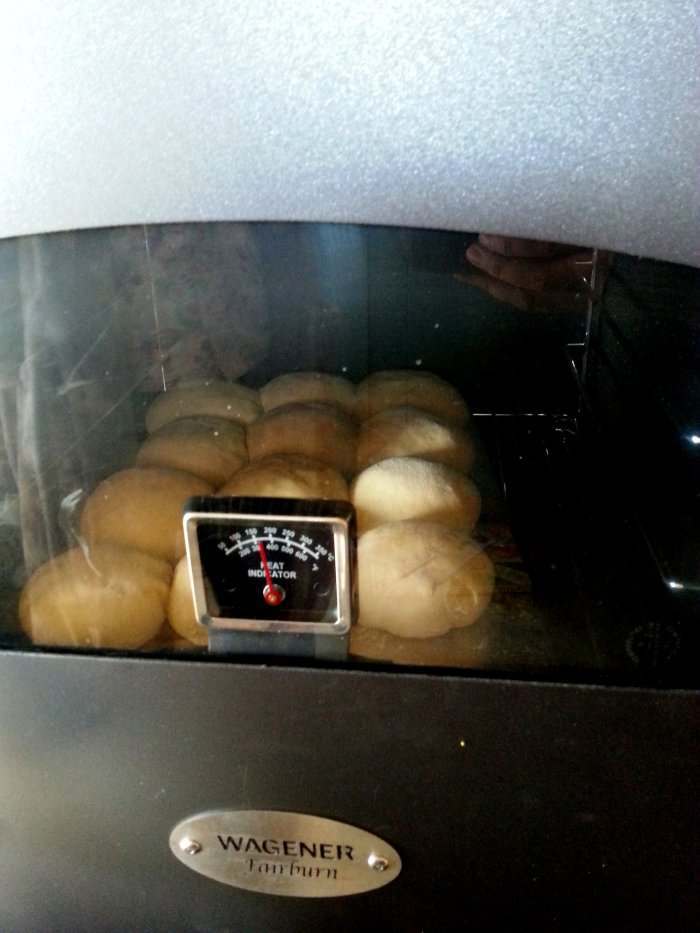
Because of that experience, we spent a little more and installed a Wagener Fairburn wood fired cook stove in our new place. It has been such a blessing. This post is one from the first month that we were in our house.
We are in the new house!! We are all camping on mattresses on the floor. The house is a mess and we have no carpet. But we are in! The kids rooms have insulation in the ceiling so they are nice and warm – but our room doesn’t. Brrrr!

So much has happened in the last week, it feels like it has been a month since last Saturday.
Moving weekend consisted of all the May rain (usually there is lots of rain in May, and sometimes snow!) pouring down in the 48 hours we chose to move house. It was wet, wet, wet! As a result
1) Only a few people helped move (THANK YOU!! to those that did) and
2) Most of our belongings ended up in the lounge/kitchen. To be fair a lot of them are to go in the kitchen – how much stuff does one need to run a kitchen? Apparently many, many boxes full.
So my new(old) beautiful kitchen is SUCH a mess right now. I am waiting to build some shelves for the back wall.
But ceiling insulation is of more importance so my shelves will have to wait for now. Maybe next week. Maybe.

We have had a few issues with getting the wetback/radiator system running smoothly – we have had to tweak the pressures between the radiators to make sure all 4 were running as they are different sizes, and the overflow on to the roof keeps triggering at 75-80 deg C rather than 90-100 deg C.
So our plumbers are amazing and keep popping out to tweak things for us. When the system is running it is AMAZING! It heats our whole house and our hot water.
I am sure it will be even better once the house is insulated. Now the pump seems to be tripping the cutout switch on our switchboard, so the electrician is coming in the morning to hopefully sort that out.
My review of the Wagener Fairburn Wood fired cookstove

When we get our little Wagener Fairburn woodfired stove up and running it heats our living room, heats its oven to 200+ deg C (400F) and heats our hot water to 90 deg C (200F) and runs 4 radiators in the bedrooms which is enough to make to rooms feel warm despite the lack of ceilings. PLUS I can cook on it or in it. It is WONDERFUL!
I am impressed to say the least. Especially considering that is on crappy pine that is quite damp from the rain.
Cooking on our wood fired stove
Our first adventure cooking on the woodfired stove was pikelets – it took a while to heat the pan through but once it was up and running we were off. Worked like a charm.
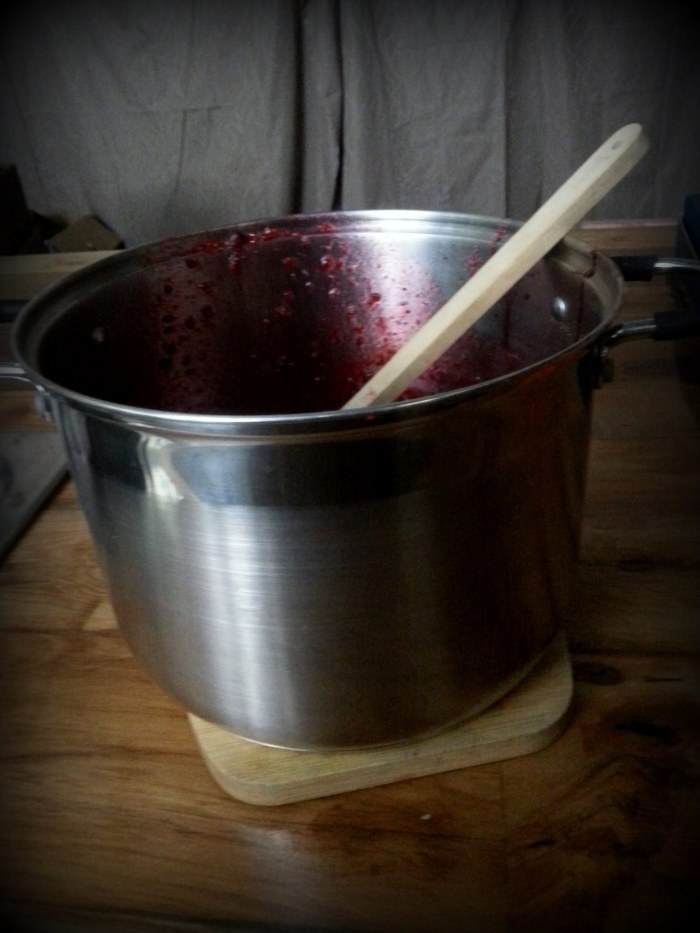
Next I made jam from 2kg (4lb) of raspberries I found in the freezer from our last place. So of course we had to make more pikelets to eat with it!
The next day Miss 5 and I made bread while the baby slept. I left it to rise on a tray sitting on top of a pan sitting on top of the stove while the oven heated. They were hands down the best bread buns I have ever made. Light and fluffy and so very delicious.
RELATED POST: Making no knead sourdough

While cooking on the stove I discovered that if you open the top to load the wood in I could fit 6 logs in it rather than using the pretty door at the front which I could only fit 2 in through.
It takes a good 60-90 minutes for the fire to get hot enough to cook with, so you do have to allow for that. But to be honest I kinda like it making us slow down and enjoy the process rather than just flicking a switch and walking away.
I think I am secretly a romantic at heart that loves the idea of returning to the old days gone by.
RELATED: How to light a fire without kindling
RELATED POST: The best firewood for a cookstove
Also today we picked up our new puppy Daisy. She is very cute and the children are smitten. (update: Daisy went back to the breeder when her exceptionally strong prey drive led to her attacking kittens and eating numerous chickens)

Easy Pikelet Recipe
Here is the Pikelet recipe we used:
25g butter, melted
1 household Tbsp golden syrup
1 Tbsp sugar
1/2 cup milk
1 large egg
1 cup self-raising flour
Heat a frypan. (Use a high heat setting if frypan is electric.)
Put the melted butter in a fairly large bowl, add the golden syrup and stir to mix everything together. Beat in the sugar, milk and egg. Add the flour then mix with a beater just until smooth.
Cook in spoonfuls in an oiled, heated frypan. When first bubbles burst on each pikelet, flip over. Second side is cooked when centre springs back when pressed.
Place the cooked pikelets on a clean dry teatowel, and cover to keep warm while you cook the remaining mixture.
For a treat, spread some raspberry jam on each pikelet then put a spoonful of whipped cream onto the jam. Delicious!
best easy pikelet recipe in NZ Heat a frypan. (Use a high heat setting if frypan is electric.)Easy Pikelet Recipe
Ingredients
Instructions
Put the melted butter in a fairly large bowl, add the golden syrup and stir to mix everything together. Beat in the sugar, milk and egg. Add the flour then mix with a beater just until smooth.
Cook in spoonfuls in an oiled, heated frypan. When first bubbles burst on each pikelet, flip over. Second side is cooked when centre springs back when pressed.
Place the cooked pikelets on a clean dry teatowel, and cover to keep warm while you cook the remaining mixture.
For a treat, spread some raspberry jam on each pikelet then put a spoonful of whipped cream onto the jam. Delicious!